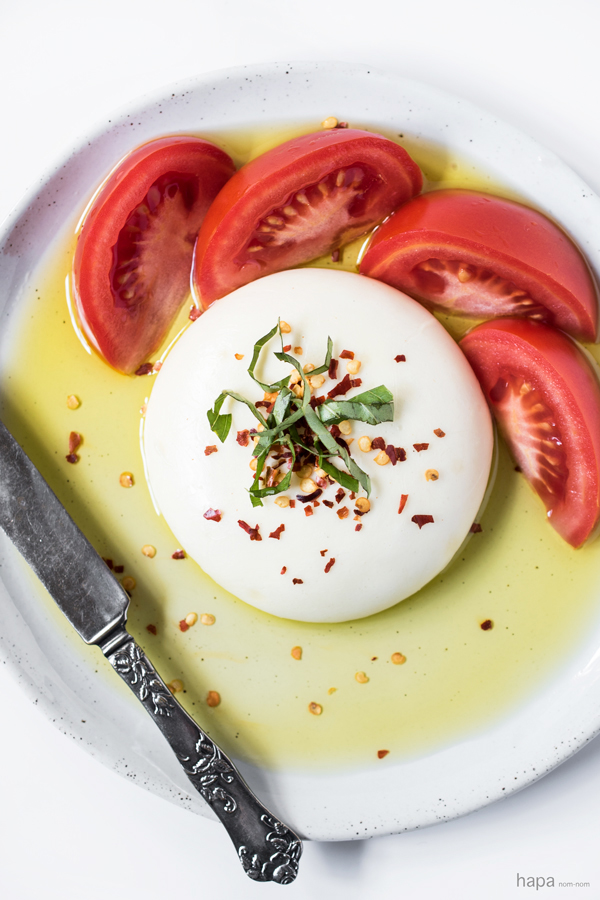
Do you love fresh mozzarella? How about mozzarella that’s SO fresh, that it’s still warm? You do!? Well… what if I told you that you could make your own in just 30 minutes?! As the old adage goes, ‘give a man a ball of mozzarella and you feed him for a day; teach a man how to make mozzarella and you feed him for a lifetime’. Ok, maybe that’s not exactly how it goes, but you catch my drift.  Several years ago, when my now husband, then boyfriend and I first started dating, we took a class on fresh cheese making. I was astounded at how quickly and easily one could make mozzarella! First you warm the milk with citric acid, add rennet to separate the curds and whey. Cut the curds, heat again, drain and then fold and stretch – done. While the process is surprisingly easy, you do need a few special ingredients, the first being citric acid (sometimes known as ‘sour salt’) – it’s the powdered form of the tart acid that is found in lemons and limes, and it aids in the coagulation of the milk. The other special ingredient is rennet, which curdles the milk. It comes in either tablet or liquid form, as well as animal and vegetable versions. I prefer to use liquid animal rennet, but feel free to use whatever form suits you best. You may be able to find both of these products at a gourmet grocery store, otherwise you can order them online – I like to use New England Cheese Making Supply Company.
 Now that we’ve discussed citric acid and rennet, let’s talk a bit about the milk – after all, it is the primary ingredient. You can pretty much use any percentage milk you like, just be aware that the lower the percentage of fat, the drier your cheese will be. A must, when selecting your milk, is to make sure that it is not ultra pasteurized. Ultra pasteurized milk does not make good cheese. During pasteurization, the milk is heated to a level that damages the calcium and proteins that are needed to bind the milk proteins and form a curd. That being said, you can and should use pasteurized milk – just not ultra pasteurized.
  After you have taken the curds, you will be amazed at how much whey (the liquid) is leftover. The whey can be refrigerated or frozen and used in baking, soups, and/or smoothies. Give it a taste – it’s subtly sweet, much like a delicate version of fresh ricotta cheese.
- 1¼ cup water, divided
- 1½ teaspoons citric acid
- ¼ teaspoon liquid rennet or ¼ rennet tablet (not Junket rennet)
- 1 gallon whole milk, do not use ultra pasteurized*
- kosher salt for sprinkling
- Special Equipment:
- Thermometer
- Gloves suitable for culinary use
- In a small bowl or measuring cup, mix the citric acid into 1 cup of cool water until dissolved. In another small bowl or measuring cup, mix the rennet into a ¼ cup of cool water. (Be sure to keep them separate and remember which one is which).
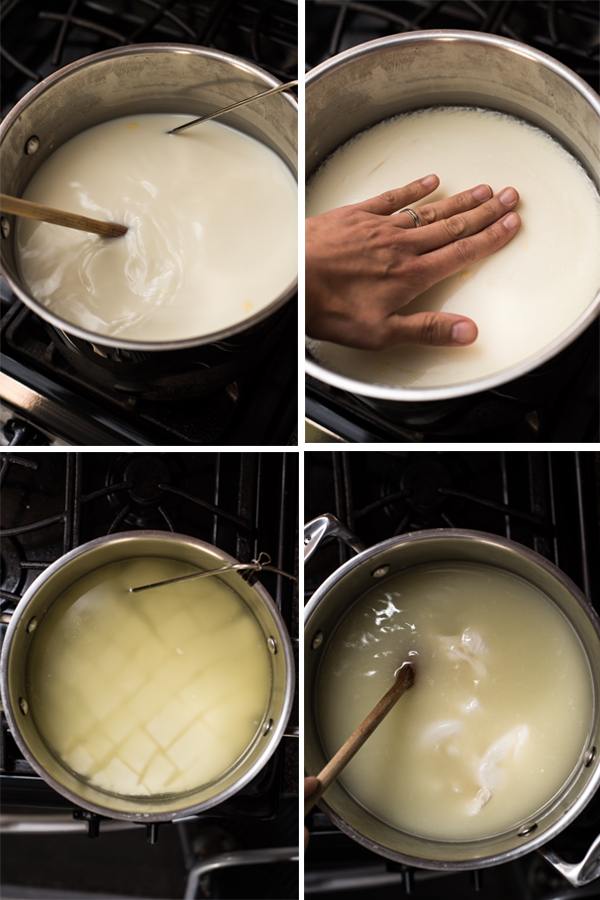
- Pour the milk into a 5 quart pot. Stir in the citric acid solution and set the pot over medium-high heat. Warm to 90 degrees F, stirring gently and frequently.
- Turn off the heat and gently stir in the rennet solution. Count to 30 and then stop stirring. Cover the pot and allow it to sit undisturbed for 5 minutes.
- After 5 minutes, check the curd which should look and feel like silken tofu, with a clear seperation between the curd and the whey around the edges of the pot. If your milk did not form a curd, allow it to sit for another 5 minutes undisturbed. If you are still having issues with your milk not forming a curd, you may need to re-evaluated your milk source - (ultra-pasteurized milk will not work very well).
- With a knife that is long enough to reach the bottom of the pot, cut the curd into a checkerboard pattern.
- Place the pot back over medium heat and warm the curds to 105 degrees F. Stir slowly and constanly. Try not to break the curds up too much, though they will eventually clump together.
- Turn off the heat and continue stirring constantly for 5 more minutes.
- Using a slotted spoon, ladle the curds into a bowl. Reheat the whey (the liquid) to 150 degrees F - the cheese will not stretch until it reaches 135 degrees F. At this point you need to decide if you want to make 1 large ball, 2 smaller balls, or divide it into thirds (I did the latter).
- Put on your gloves - you'll be handling curds that are very hot. Using a slotted spoon, lower the curds into the hot whey for a few minutes. To test if it's ready, pull a little piece - it should be very stretchy. Once ready, remove the curd sprinkle with salt and working quickly, pull, fold, and pull, repeating only one or two times. Then form into a ball by making a circle with your thumb and forefinger and pressing the mozzarella through. Place on a plate and continue to form the remaining curds in the same manner.
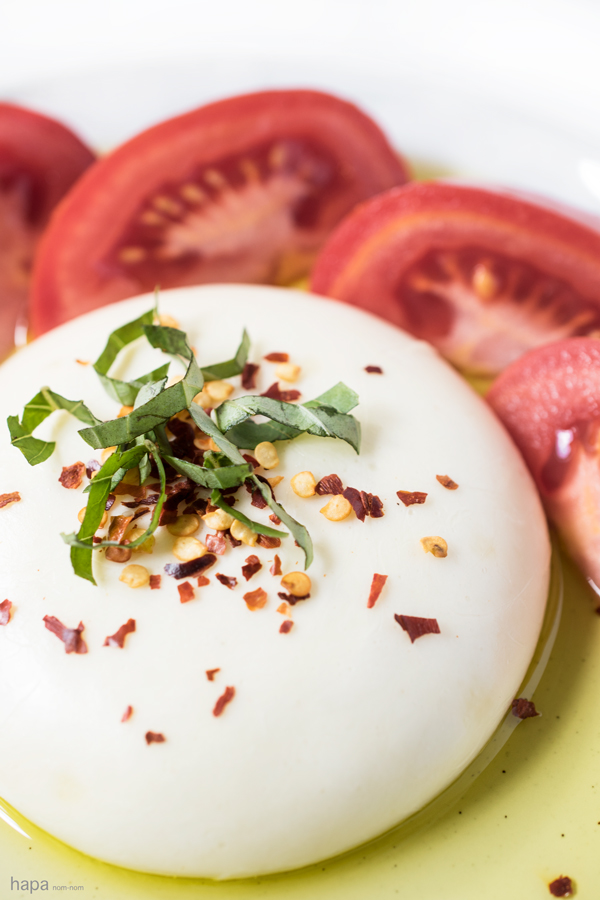
- You may serve immediately or tightly wrap and refrigerate. Serve with your desired accompaniments. It's great with just a little sea salt sprinkled on top as well. Enjoy!


I’ve wanted to make my own mozzarella forever! Can’t wait to try this.
I have tried (and occasionally failed) a number of recipes for mozzarella. I use fresh raw milk from our cow, and I have to say, this is the quickest, easiest and most failure resistant recipe ever! And I love the fact that it uses the whey and not (gasp) the microwave. Thank you!
A quick note: after I am done making the mozzarella, I continue heating the leftover whey to 190 degrees, let it cool to 100 and strain it through cheese cloth. And I then have terrific ricotta too!
Omg, you get your milk from your own cow! How cool is that?! My husband is a large animal vet, so I’m sure he would be having a field day at your place! 🙂
Making ricotta with leftover whey is a fantastic idea! I’ve only done it from the milk curds right off the top. So I will definitely be trying that with the whey next time I make moz! Thanks, Linda!
I make ricotta all the time but first time to make mozzarella. I was planning on making mozzarella and ricotta today and noticed your comment about using the left over whey from the mozzarella, do you add anything else to it like heavy cream or champagne vinegar or just heat to 190?
Hi Dawn! I have used the whey in various soups and chili in conjunction with a stock or broth. I’ve also used it to thin out sauces if they need it. But feel free to experiment with it, like adding heavy cream to perhaps make something like a panna cotta. Or the Champagne vinegar to make a dressing. Hope this helps and I hope you enjoy the rest of your weekend 🙂
Hi Dawn. I just noticed your comment was directed to another reader comment as soon as I hit ‘reply’. I have not tried Linda’s method, but it certainly does sound intriguing. Perhaps we’ll hear back from her. Have a good one! 🙂
I’ve been looking for a homemade mozzarella recipe that doesn’t use the microwave – so thank you, thank you, thank you for this – can’t wait to try it with our local tomatoes coming into season!
Hi Kari! I never really understood the use of a microwave when making mozzarella, when it’s so easy just to do it the ‘old fashioned’ way. Some local tomatoes sounds like a fabulous pairing! I hope you enjoy!
I can’t get over how amazing this is. Seriously in awe. LOVE THIS.
Thanks, Melissa! It’s surprisingly easy to make! Be warned though… once you know how to make your own mozzarella, you’re cheese consumption may increase exponentially 😉
Love, love, love. I had no idea that making mozzarella cheese was so easy. We eat a ton of it in our house (love those caprese salads!) so I love the idea of having mozzarella so fresh it is still warm. Now to get that cheese kit. . .
Making your own cheese is so much fun and so satisfying! I’m sure that cheese kit will get plenty of use 😉
Even before I read the recipe, I’ve pinned it, shared it on Facebook and tweeted it. One word. LEGENDARY. Can’t wait to try it!! (Once I hunt down rennet!)
Thank you my dear. If the link I shared doesn’t ship internationally, there’s always Amazon 🙂
Ordered the rennet and citric acid on Amazon-will try to, will post results soon.
That’s great, Charles! Yes, please let me know! 🙂
I’m impressed Kathleen, love the fresh mozzarella you made! Will definitely try to make it following your instructions, I love mozzarella! Great inspiration! Have a nice weekend!
Thanks so much, Mira! It really is a lot of fun to make your own mozza 🙂 You have a wonderful weekend too, my dear!
I followed your recipe and oh my foodgod so good!
Thanks, doll! And your salad on IG looks INCREDIBLE!
No, I think that’s exactly how the quote goes! It does in our house, anyway!! Okay – your pictures are killing me. But this recipe – fuggedaboudit! It’s a KEEPER! I love it, my friend!
Thank you so much for you sweet words, Annie 🙂
I like the way you think! I kinda want to inscribe that on a placard and hang it in my kitchen 😉
How awesome this is!!!! LOVE fresh mozzarella. I can put them in any salad! It doesn’t sound too difficult. Gotta try this one day! I love that you did a cheese class with your husband. I would love to check them out too if I can get my husband to do it! 😀
It’s surprisingly easy – I hope you give it a try! Maybe you could get your hubby to help 🙂
Kathleen – Who knew making mozzarella could be so fun and easy! I love that you shared this with us. My boyfriend’s mom has been asking me to make homemade pasta with her and I think I’ll suggest that we create our own mozzarella to top the fresh pasta with! 😀
Oh wow! Making homemade pasta with your boyfriend’s mom sounds like SO much fun! There’s something so therapeutic about making your own pasta, isn’t there? And I think the fresh mozzarella sounds like a fantastic idea! 🙂
I’ve never made my own mozzarella before.. what a cool project!
Oh I hope you give it a try – it’s so much fun and so satisfying to know that you can make your own 🙂
Oh I love this post! You did a wonderful job of showcasing all the steps, yet the simplicity of making your own Mozza! (And I love the blue gloves- tres chic!) I had so much fun making fresh cheese in culinary school, but I could not have translated the process as well as you did in in pictures! ♡ bravo!! Such a fun and inspiring post! My admiration of you continues to grow with each post. #GirlCrush! (Don’t tell my hubs! Lol)
Wow – (blushing*) thank you so much for your kinds words, Cheyanne! Though I must say, the things that you create totally blow my mind – girl crush totally reciprocated. I won’t tell your hubby, if you don’t tell mine 😉
I have seen people make mozzarella on TV before, but never with this much detail. It looks like fun and something I would like to try one day. Thanks for a great tutorial, Kathleen!
Sure thing, Thao! I’m so glad you found the instructions helpful! Had I not actually taken a cheese making class with an instructor to hold my hand through the process, I would have been totally lost with general/basic mozzarella instructions.
So I am a little obsessed with fresh mozz. But more than anything I want to find the time to make burrata…the sinful brother of fresh mozz 🙂
Burrata is on my to-list! Talk about sex on a plate! 😉
Oh I know!!! I just had some this weekend holy hell!!! That is sinful
Ha! I’m afraid if I learn how to make burrata, none of my clothes will fit anymore 😉
Ditto!
I’ve always wanted to make my own mozzarella and now you have inspired me. I can only imagine how good it is being that fresh. Thank you for sharing.
Thanks, Janette! It’s not only quick and easy, but it’s a lot of fun too! It’s like conducting one of those science experiments from when you were a kid – watching milk separate into curds and whey right before your eyes! So cool!
Thank you so much for posting this! Since I’ve been making my own yogurt for a while now (using my slow cooker), cheese would be the next step. And the process sounds pretty easy.
Ooo… you make your own yogurt in a slow cooker!? I’ve never tried that – I’ll have to give it a go, especially with the amount of yogurt I eat! 😉
Making your own mozzarella is surprising quick and easy… and totally dangerous. Your will-power may be tested 😛
I must try this, also sharing to Welcome to My Kitchen early tomorrow on Facebook-love your recipes-Charles
Thanks so much, Charles! Great FB page – ‘liked’ for sure 🙂
We appreciate it!.